Paint Your Countertops in 6 Easy Steps
Painted Countertops in 6 Easy Steps. Painted Countertops!?! I know, I know, this sounds crazy, but it has been one of my most successful DIY projects. I am here to tell you why, and how to paint your countertops in 6 easy steps. Are you ready?
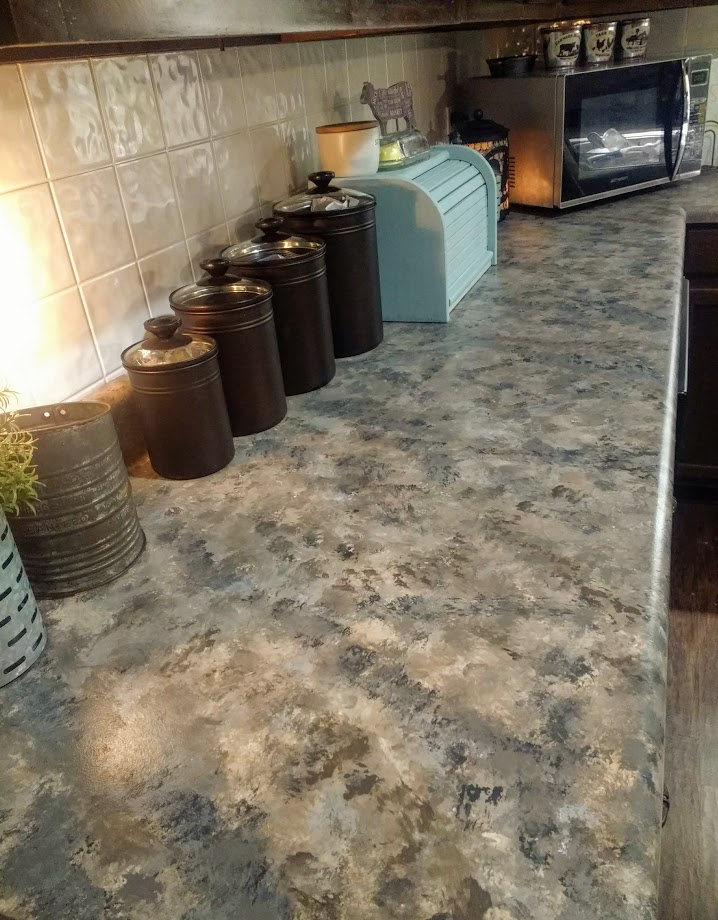
Why paint Countertops?
First of all, I will explain why I chose to paint my counter tops. My husband and I bought our first home at the end of 2016, a fixer upper none the less. We knew we would have tons of updates to make to our home, but the kitchen countertops were definitely not at the top of the list.
Our countertops were white Formica with little flecks of gold glitter, likely from the 70’s or 80’s. They had a few dents and dings, normal for countertops a few decades old. My favorite “ding” included a spot where someone had clearly sat a very hot pot at some point. If you have ever had white, laminate countertops you will know they are very easily stained. Especially with red kool-aid, which happens to be my favorite.
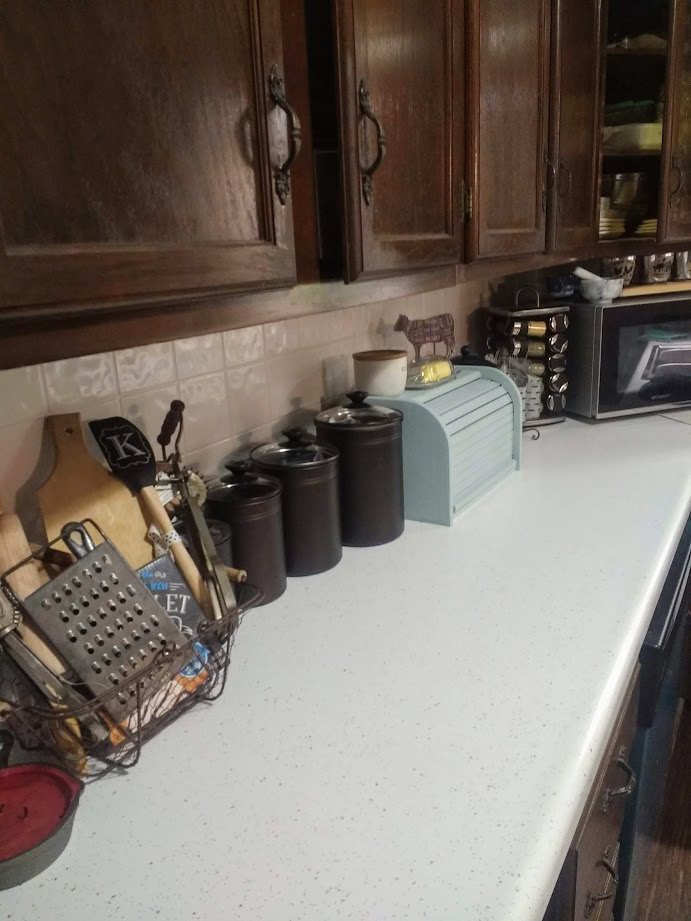
At the beginning of 2018, I was ready for a change. I knew I wanted to update the countertops, but I really didn’t want to rip everything. Concrete countertops were an option, but it would definitely not be a project I could handle all by my lonesome. I also realized countertops are expensive, and this was a problem because I am..how would you say it…cheap.
One day I was scrolling through facebook, and one of my friends had posted they were attempting to use a paint kit on their countertops. I researched the paint kits and found them to be pretty expensive, and the color options were pretty limited. It looked to me like the most important part of painting countertops would be to seal them very well. So I decided to take the process into my own hands.
What will you need to Paint Countertops?
A Sander – We used a small electric sander, and I recommend this, especially if you have quite a bit of surface to cover. You could try sanding by hand, but I imagine it would be quite the task.
Sand Paper – We used 150 grit.
Primer – I used Kilz All Purpose because I use this for everything, and I always have it on hand.
**Tip: If you are planning on going with a dark colored countertop I would recommend a gray primer, to save time later when you are layering on all your colors.
Small Sponges – We used natural sea sponges used for painting. You can find them in the craft section.
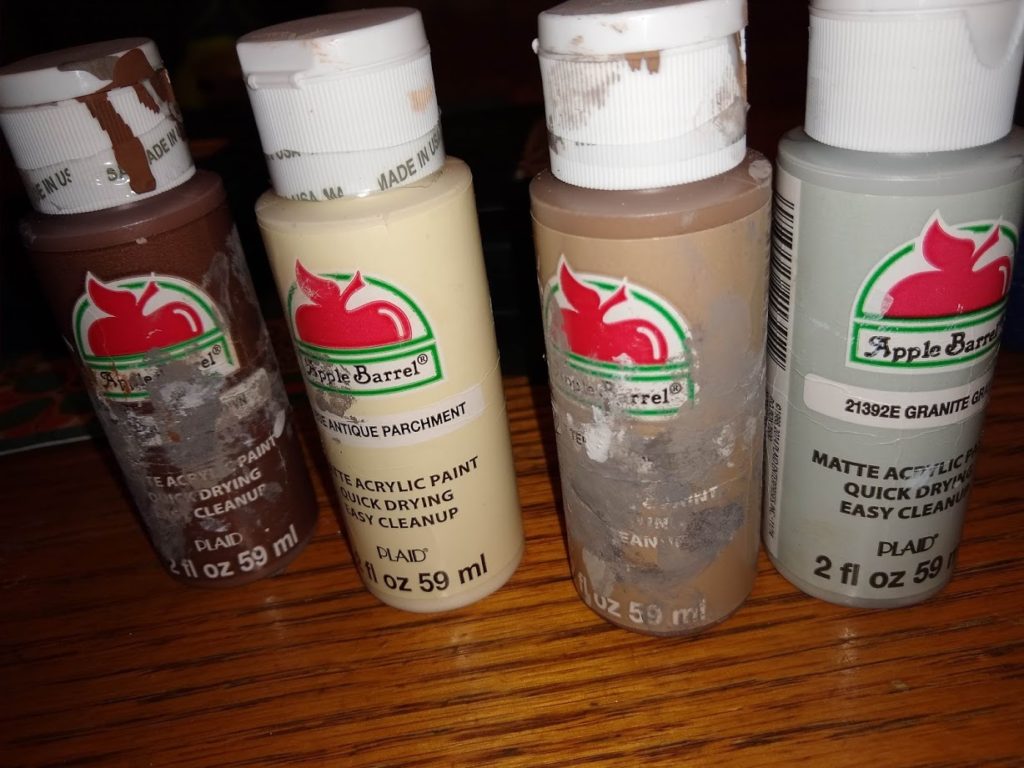
Acrylic Paint – I used the little bottles of the Apple Barrel brand paint you can usually find for about $1.00 a bottle, in the craft section. This is what you will use to create all your colors. **I recommend finding a picture of your ideal countertops, and choose colors you can mix and match to replicate the picture.
Small Sponge Roller – You will want to use a roller to apply your primer, but to also put on your protective finish used to seal your counter tops. I used a 4 inch Foam Roller, and I recommend getting two. These are the perfect shape for getting the back area of your countertops coated well.
Protective Finish – This is the most important step. I use Minwax Polycrylic in the Clear Satin. I highly recommend this brand. A little bit goes a long way, and it has really held up over the years. You want to make sure you are using a water based finish.
Now that you have everything you need all lined up..it’s time for the fun part.
Steps to Paint Countertops
- First, you want to sand your countertops to give them a little grit for the primer to hold on to. You would also want to sand down any rough spots, or unlevel parts of your countertop. Remember when I mentioned my burned spot on my countertop? I sanded this spot smooth, and you can’t even tell it was ever there.
- After you finish sanding, you want to make sure you wipe your counters down with a damp rag to make sure they are clean. You will have some residue after sanding; however, it was a not nearly as much as I expected.
- Next, you can start the priming process. I just applied one thin coat of white primer with a foam roller. My counters were already white, so one layer was enough to coat everything, and created the perfect base to start painting.
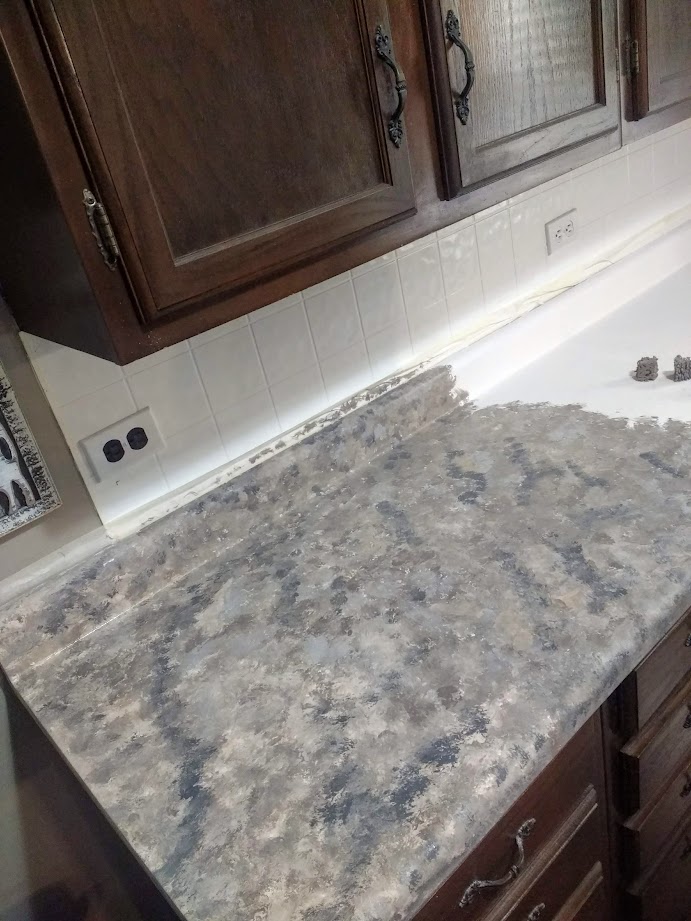
- Now it’s time to get creative, and start thinking about paint colors. My **Top Tip is really making sure to mix different paint colors together to make more elevated colors. The colors straight from the bottle can come off looking a little cheap, and harsh for your counters. So grab a paper plate, or something you can use as a palate, and mix a little of two or three of the craft paints together to come up with several colors that you fancy.
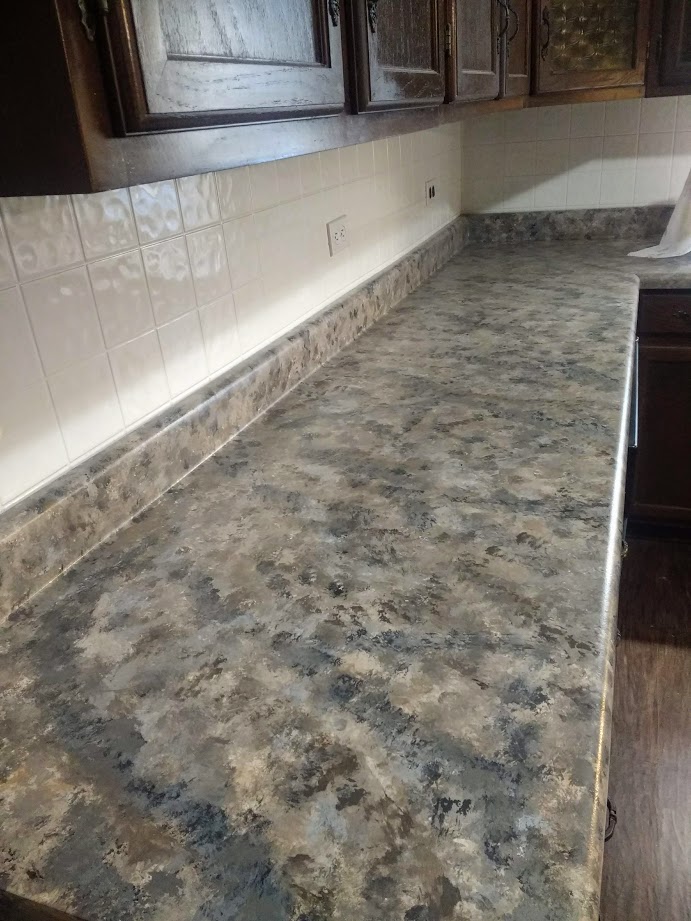
5. Next, to start painting, dip your sponge, lightly, into the paint and start dabbing onto your countertop. I worked in 2-3 foot sections, moving left to right. Keep adding and building colors until you start to make a pattern that you like, or one that looks like the picture you may have been using as a guide. **At first it may look odd, but keep going, and building. It takes quite a few different colors and shades, but once it starts coming together you will see the difference. You will be amazed if you just keep on dabbing, and in no time you will have a masterpiece.
6. Now for the last step, the protective finish. The Minwax is very forgiving, but you do want to make sure you are working quickly, and keeping everything smooth. I started rolling with my foam roller, working left to right, and covered the whole countertop.

I applied 4-5 coats of the Minwax, making sure to let it dry completely between coats. It took me one afternoon, working into the evening To complete my whole kitchen. I let my countertops cure for a little over 24 hours, and placed everything back on them when I was sure they were dry.
And that’s it! Now get off your butt and start painting!

Top 5 Goodwill Shopping Tips
You May Also Like
Open Faced Beef Sandwich
October 18, 2023
Crock Pot Apple Crisp
October 12, 2020